DIY Henna Tattoo with Sharpie: Safety, Alternatives, and Realistic Expectations
The allure of temporary body art has led many to explore creating a DIY henna tattoo with Sharpie. While the idea of achieving a henna-like design quickly and easily using a Sharpie marker is tempting, it’s crucial to understand the potential risks and explore safer, more effective alternatives. This article delves into the realities of using Sharpie for skin decoration, highlighting why it’s generally not recommended and offering better options for achieving temporary henna-style designs.
The appeal of DIY henna tattoo with Sharpie lies in its accessibility. Sharpie markers are readily available, inexpensive, and come in a variety of colors. However, the composition of Sharpie ink is not designed for skin application, making it a potentially hazardous choice for creating temporary tattoos.
The Dangers of Using Sharpie on Skin
Sharpie markers contain industrial solvents and dyes that are not intended for contact with human skin. These chemicals can cause a range of adverse reactions, including:
- Allergic Reactions: Some individuals may be allergic to the ingredients in Sharpie ink, leading to skin irritation, redness, itching, and swelling.
- Dermatitis: Prolonged or repeated exposure to Sharpie ink can cause contact dermatitis, an inflammatory skin condition characterized by a rash, blisters, and discomfort.
- Chemical Burns: In some cases, the solvents in Sharpie ink can cause chemical burns, resulting in pain, blistering, and potential scarring.
- Infections: Broken or irritated skin from using Sharpie can become vulnerable to bacterial infections.
The U.S. Food and Drug Administration (FDA) has not approved Sharpie markers for use on skin. While some Sharpie markers are labeled as “nontoxic,” this designation refers to ingestion, not skin application. Even nontoxic markers can cause irritation and allergic reactions when applied to the skin.
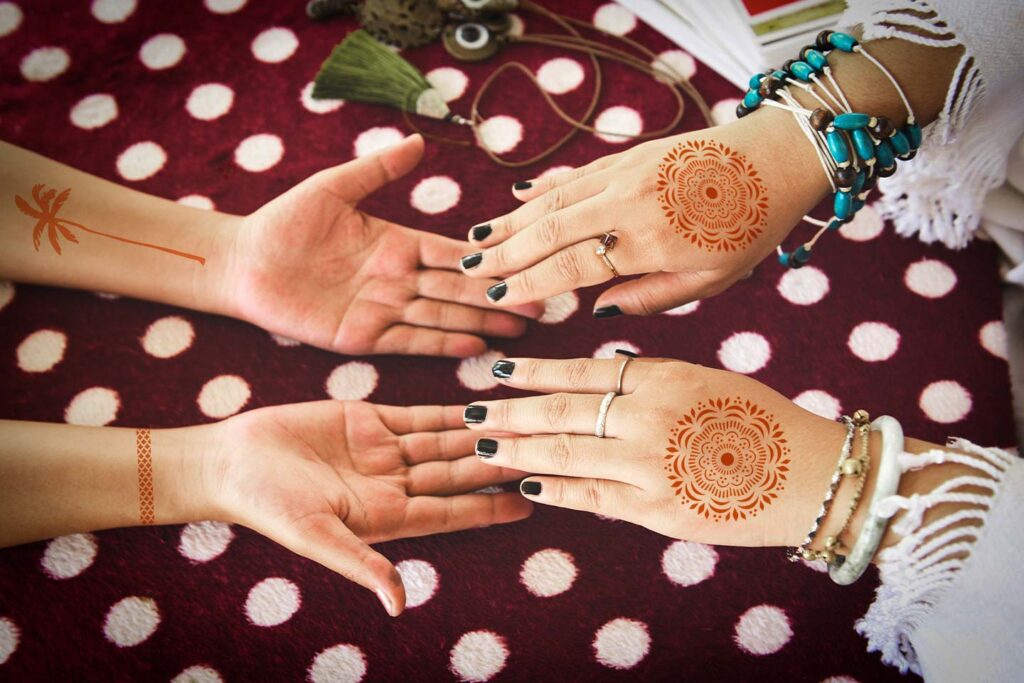
Why Real Henna is a Better Choice
Traditional henna is a natural dye derived from the henna plant (Lawsonia inermis). When applied to the skin, it stains the surface a reddish-brown color. Real henna is generally considered safe when used properly, but it’s essential to ensure that you’re using pure, natural henna and not a product that has been adulterated with harmful chemicals.
Black henna, often used to create darker and faster-developing temporary tattoos, is a common culprit for adverse reactions. Black henna typically contains a high concentration of paraphenylenediamine (PPD), a chemical dye that can cause severe allergic reactions, blistering, and permanent scarring. Always ask about the ingredients before getting a henna tattoo, and avoid any product that claims to be “black henna”.
Safer Alternatives to Sharpie Henna Tattoos
If you’re looking for a safe and temporary way to create henna-inspired designs, consider these alternatives:
- Temporary Tattoo Markers Specifically Designed for Skin: These markers are formulated with skin-safe ingredients and are available in a variety of colors. Look for markers that are labeled as “nontoxic” and “dermatologist-tested.” Always test the marker on a small area of skin before applying it to a larger area.
- Henna Paste: Purchase pre-made henna paste from a reputable source or make your own using pure henna powder, lemon juice, and essential oils. Ensure that the henna is a natural reddish-brown color and avoid any products that claim to be “black henna.”
- Jagua Gel: Jagua is a natural fruit dye that produces a temporary tattoo that is blue-black in color. It is a safe and effective alternative to black henna.
- Body Paint: Use body paint that is specifically designed for skin application. These paints are available in a wide range of colors and can be used to create intricate designs.
- Henna Stencils: Use stencils to easily create henna-inspired designs. Stencils can be used with henna paste, jagua gel, or body paint.
How to Apply a Safe Temporary Tattoo
Regardless of the method you choose, it’s important to follow these steps to ensure a safe and successful application:
- Clean the Skin: Wash the area of skin where you will be applying the tattoo with soap and water. Dry thoroughly.
- Test for Allergies: Apply a small amount of the product to a discreet area of skin, such as the inside of your wrist. Wait 24 hours to see if any irritation occurs.
- Apply the Design: Carefully apply the design using your chosen method. If using henna paste or jagua gel, follow the instructions provided with the product.
- Allow to Dry: Allow the tattoo to dry completely. This may take several hours, depending on the product used.
- Remove Excess Paste: If using henna paste or jagua gel, gently scrape off the dried paste. Avoid washing the area for several hours to allow the stain to develop fully.
- Moisturize: Apply a moisturizer to the area to help the tattoo last longer.
Realistic Expectations for DIY Henna Tattoos
It’s important to have realistic expectations when creating DIY henna tattoo with Sharpie alternatives or even using genuine henna. Temporary tattoos are just that – temporary. The duration of the tattoo will depend on several factors, including the type of product used, your skin type, and how often you wash the area. Generally, temporary tattoos will last for a few days to a couple of weeks.
The color of the tattoo will also vary depending on the product used. Natural henna will produce a reddish-brown stain, while jagua will produce a blue-black stain. Temporary tattoo markers and body paint are available in a wide range of colors.
The Bottom Line on Sharpie Tattoos
While the idea of a DIY henna tattoo with Sharpie might seem like a quick and easy solution, the potential risks outweigh the benefits. Using Sharpie on your skin can lead to allergic reactions, dermatitis, chemical burns, and infections. Safer alternatives, such as temporary tattoo markers, henna paste, jagua gel, and body paint, are available and can provide a similar effect without the risks.
Prioritize your skin’s health and well-being by avoiding the use of Sharpie markers for temporary tattoos. Explore the safer alternatives mentioned above and enjoy the fun of temporary body art without compromising your health.
Before attempting any DIY henna tattoo with Sharpie alternatives, conduct thorough research and always prioritize safety. A little extra effort in choosing the right materials and techniques will ensure a fun and safe experience.
Ultimately, the goal is to enjoy the beauty of temporary body art without jeopardizing your health. Steer clear of potentially harmful methods like using Sharpie and embrace the safer, more reliable alternatives available. Happy tattooing!
Remember, a DIY henna tattoo with Sharpie is never a good idea. Your skin will thank you for choosing a safer alternative.
Making informed decisions about your body art ensures a positive and healthy experience. So, ditch the DIY henna tattoo with Sharpie concept and embrace the world of safe and beautiful temporary tattoos!
Always prioritize safety and well-being over convenience when it comes to any DIY henna tattoo with Sharpie alternatives.
The desire for a quick fix should not compromise your health. Therefore, avoid the temptation of a DIY henna tattoo with Sharpie.
Instead, explore safer and more reliable options for achieving the desired temporary tattoo effect. Leave the DIY henna tattoo with Sharpie where it belongs: in the realm of bad ideas.
For those seeking a temporary body art experience, the key is to choose methods that are both safe and effective. This means avoiding the pitfalls of a DIY henna tattoo with Sharpie and opting for alternatives that prioritize skin health.
[See also: Temporary Tattoo Ideas for Summer]
[See also: How to Make Henna Paste at Home]
[See also: Safe Body Paint Options]
