How to Change Orientation of Worksheet to Landscape: A Comprehensive Guide
In the world of spreadsheets, particularly within applications like Microsoft Excel and Google Sheets, the orientation of your worksheet can significantly impact readability and presentation. Understanding how to change orientation of worksheet to landscape is a fundamental skill for anyone working with data. Whether you’re printing a large dataset or creating a visual report, knowing how to change orientation of worksheet to landscape will allow you to optimize the layout for maximum clarity. This guide will provide a step-by-step walkthrough on how to change orientation of worksheet to landscape in both Excel and Google Sheets, ensuring your spreadsheets are always presented in the best possible format.
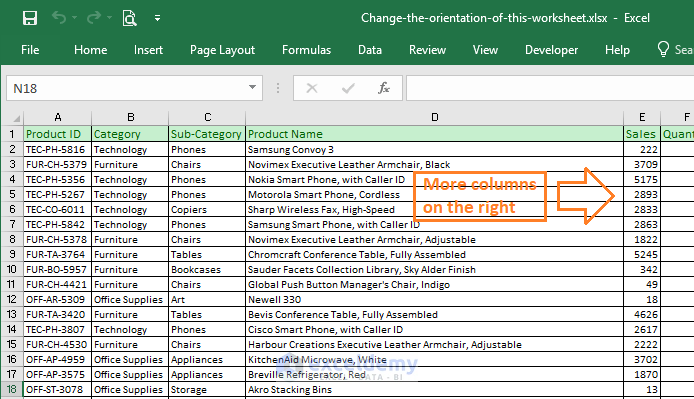
Why Change Worksheet Orientation to Landscape?
Before diving into the how-to, let’s explore why you might want to change orientation of worksheet to landscape. The default orientation for most spreadsheets is portrait, which is taller than it is wide. This works well for documents with a lot of vertical data. However, when your worksheet contains numerous columns or a wide table, landscape orientation, which is wider than it is tall, becomes a more suitable choice. By choosing to change orientation of worksheet to landscape, you can fit more columns onto a single page, reducing the need for horizontal scrolling and making it easier to view and print your data. Furthermore, landscape orientation often enhances the visual appeal of charts and graphs, particularly those spanning across multiple categories or time periods.
Changing Worksheet Orientation to Landscape in Microsoft Excel
Microsoft Excel is a powerful tool used extensively in business and academia. Here’s how to change orientation of worksheet to landscape within Excel:
Method 1: Using the Page Layout Tab
- Open Your Excel Worksheet: Begin by opening the Excel worksheet you want to modify.
- Navigate to the Page Layout Tab: Click on the “Page Layout” tab located in the Excel ribbon at the top of the screen.
- Select Orientation: In the “Page Setup” group, find the “Orientation” dropdown menu.
- Choose Landscape: Click on the “Orientation” dropdown and select “Landscape.”
By following these simple steps, you can quickly change orientation of worksheet to landscape. Excel will automatically adjust the worksheet’s layout to fit the new orientation. This is the most straightforward method for most users.
Method 2: Using the Print Preview
Another way to change orientation of worksheet to landscape in Excel is through the print preview function:
- Open Your Excel Worksheet: Open the worksheet you wish to adjust.
- Go to Print Preview: Click on the “File” tab, then select “Print” from the left-hand menu. This will take you to the print preview screen.
- Page Setup: In the print preview settings, look for the “Page Setup” option (it might be labeled differently depending on your version of Excel).
- Orientation Settings: In the “Page Setup” dialog box, navigate to the “Page” tab.
- Select Landscape: Under the “Orientation” section, choose “Landscape” and click “OK.”
This method is particularly useful if you want to see how the worksheet will look when printed after you change orientation of worksheet to landscape. The print preview gives you a clear view of the layout, allowing you to make further adjustments as needed.
Additional Tips for Excel
- Adjust Margins: After you change orientation of worksheet to landscape, you may need to adjust the margins to maximize the use of the available space. You can find margin settings in the “Page Layout” tab under the “Margins” dropdown.
- Scale to Fit: If your data still doesn’t fit on a single page after changing to landscape, consider using the “Scale to Fit” options in the “Page Layout” tab. This allows you to shrink the worksheet to fit within the page boundaries.
- Headers and Footers: Ensure that your headers and footers are appropriately formatted after you change orientation of worksheet to landscape. You can customize headers and footers by going to “Insert” tab and selecting ‘Header & Footer’.
Changing Worksheet Orientation to Landscape in Google Sheets
Google Sheets, a popular cloud-based spreadsheet application, also offers a simple way to change orientation of worksheet to landscape. Here’s how:
Steps to Change Orientation in Google Sheets
- Open Your Google Sheet: Open the Google Sheet you want to modify.
- Go to Print Settings: Click on “File” in the menu bar, then select “Print.” This will open the print settings sidebar.
- Orientation Option: In the print settings sidebar, find the “Orientation” dropdown menu.
- Select Landscape: Click on the “Orientation” dropdown and select “Landscape.”
It is very easy to change orientation of worksheet to landscape in google sheets. Google Sheets will instantly update the preview to reflect the new orientation. This allows you to see how your worksheet will look before printing or exporting it as a PDF.
Advanced Settings in Google Sheets
Google Sheets offers additional settings to fine-tune your worksheet’s appearance after you change orientation of worksheet to landscape:
- Paper Size: Make sure the paper size is appropriate for your needs. Common paper sizes include Letter (8.5 x 11 inches) and A4 (210 x 297 millimeters).
- Scale: Adjust the scaling options to ensure your data fits within the page boundaries. You can choose from options like “Fit to Width,” “Fit to Height,” or “Fit to Page.” Alternatively, you can set a custom scale percentage.
- Margins: Customize the margins to optimize the use of space on the page. You can choose from predefined margin settings or set custom margins.
- Headers and Footers: Add or edit headers and footers to include information such as page numbers, dates, or document titles.
Troubleshooting Common Issues
Sometimes, you might encounter issues when you change orientation of worksheet to landscape. Here are some common problems and their solutions:
- Data Still Doesn’t Fit: If your data still doesn’t fit on a single page after changing to landscape, try adjusting the margins, scaling the worksheet, or reducing the font size.
- Incorrect Print Area: Ensure that the correct print area is selected. In Excel, you can set the print area under the “Page Layout” tab. In Google Sheets, you can specify the print range in the print settings sidebar.
- Page Breaks: Check for unwanted page breaks. You can adjust page breaks manually in Excel under the “Page Layout” tab using the “Breaks” option. Google Sheets automatically manages page breaks, but you can adjust scaling and margins to influence their placement.
- Printer Settings: Verify that your printer settings are configured correctly. Sometimes, printer settings can override the orientation settings in Excel or Google Sheets.
Best Practices for Worksheet Orientation
Here are some best practices to keep in mind when deciding whether to change orientation of worksheet to landscape:
- Assess Your Data: Before changing the orientation, carefully assess the layout and content of your worksheet. If your data primarily consists of numerous columns, landscape orientation is likely the best choice.
- Consider the Audience: Think about who will be viewing or printing the worksheet. If the worksheet is intended for a presentation or report, landscape orientation can often provide a more visually appealing and professional look.
- Test Print: Always test print a sample page after you change orientation of worksheet to landscape to ensure that the layout meets your expectations. This will help you identify any issues before printing the entire document.
- Consistent Formatting: Maintain consistent formatting throughout your worksheet. Use the same font, font size, and alignment for all data to ensure readability.
Conclusion
Knowing how to change orientation of worksheet to landscape is an essential skill for anyone working with spreadsheets. Whether you’re using Microsoft Excel or Google Sheets, the process is straightforward and can significantly improve the readability and presentation of your data. By following the steps outlined in this guide and keeping the best practices in mind, you can ensure that your worksheets are always optimized for maximum impact. Mastering this simple technique will save you time and effort, while enhancing the overall quality of your work. So next time you’re faced with a wide dataset, remember to change orientation of worksheet to landscape and see the difference it makes.
[See also: Printing Excel Spreadsheets Efficiently]
[See also: Google Sheets Tips and Tricks]
[See also: Excel Formulas for Data Analysis]
