How to Wire Landscape Lighting: A Comprehensive Guide
Enhancing your outdoor space with landscape lighting not only adds aesthetic appeal but also increases safety and security. Knowing how to wire landscape lighting properly is essential for achieving the desired effect while ensuring the system’s longevity and safety. This guide provides a step-by-step approach to wiring landscape lighting, covering everything from planning to installation and troubleshooting.
Planning Your Landscape Lighting System
Before you begin the wiring process, careful planning is crucial. This involves determining the type of lighting fixtures you want, their placement, and the power source you’ll use. Consider the overall design and purpose of your landscape lighting. Are you highlighting architectural features, illuminating pathways, or creating a relaxing ambiance? The answers to these questions will guide your choices.
Choosing the Right Fixtures
Landscape lighting fixtures come in various styles, including spotlights, path lights, floodlights, and well lights. Each type serves a different purpose, so choose fixtures that align with your design goals. Also, consider the material and durability of the fixtures. Opt for weather-resistant materials like brass, copper, or powder-coated aluminum to withstand outdoor conditions. LED fixtures are generally preferred for their energy efficiency and long lifespan. Think about the color temperature (Kelvin) of the lights as well. Warmer temperatures (2700K-3000K) create a cozy ambiance, while cooler temperatures (4000K+) offer brighter, more focused illumination.
Determining Power Requirements
Calculate the total wattage required for your landscape lighting system. This will help you choose the appropriate transformer size. Add up the wattage of each fixture you plan to install. It’s generally recommended to choose a transformer that provides at least 20% more power than your total wattage to account for future expansion or voltage drop. Consider using a low-voltage system (12V or 24V), which is safer and easier to install than a high-voltage system. Low-voltage systems require a transformer to step down the voltage from your household current (120V) to the lower voltage required by the fixtures.
Laying Out Your Lighting Plan
Create a detailed layout of your landscape lighting system. Mark the location of each fixture and the path of the wiring. Consider the distance between fixtures and the power source. Longer wire runs can result in voltage drop, which can dim the lights. To minimize voltage drop, use thicker gauge wire or consider splitting the system into multiple zones with separate wire runs. Use landscape design software or a simple hand-drawn sketch to visualize your plan. This will help you identify potential problems and make adjustments before you start the installation.
Gathering the Necessary Materials and Tools
Having the right materials and tools on hand will make the how to wire landscape lighting process smoother and more efficient. Here’s a comprehensive list:
- Low-Voltage Transformer: Steps down the voltage from 120V to 12V or 24V.
- Low-Voltage Cable: Use direct burial cable (UF cable) that is rated for outdoor use. The gauge of the wire will depend on the total wattage and the distance of the wire run.
- Landscape Lighting Fixtures: Choose fixtures that are appropriate for your design and power requirements.
- Wire Connectors: Use waterproof wire connectors to protect the connections from moisture.
- Shovel or Trenching Tool: For burying the cable.
- Wire Strippers: To remove the insulation from the wires.
- Screwdriver: For installing the fixtures and connecting the wires.
- Voltage Tester: To ensure the power is off before working on the wiring.
- Gloves and Safety Glasses: To protect your hands and eyes.
- PVC Conduit (Optional): For added protection of the cable in high-traffic areas.
Step-by-Step Wiring Instructions
Follow these steps to wire landscape lighting safely and effectively:
Step 1: Turn Off the Power
Before you begin any electrical work, turn off the power to the circuit at the breaker box. Use a voltage tester to confirm that the power is off before proceeding. This is a critical safety precaution.
Step 2: Install the Transformer
Mount the transformer near an outdoor electrical outlet. Follow the manufacturer’s instructions for installation. Typically, you’ll need to connect the transformer to the outlet using a weatherproof enclosure. Ensure the transformer is properly grounded. The transformer should be easily accessible for maintenance and adjustments.
Step 3: Dig Trenches for the Wiring
Dig shallow trenches (6-8 inches deep) along the path of your lighting layout. The trenches should be wide enough to accommodate the low-voltage cable. Avoid digging near underground utilities. Call your local utility company to locate any buried lines before you dig.
Step 4: Lay the Low-Voltage Cable
Lay the low-voltage cable in the trenches, following the path you’ve planned. Leave some slack in the cable at each fixture location to allow for adjustments. If you’re using PVC conduit, run the cable through the conduit before burying it.
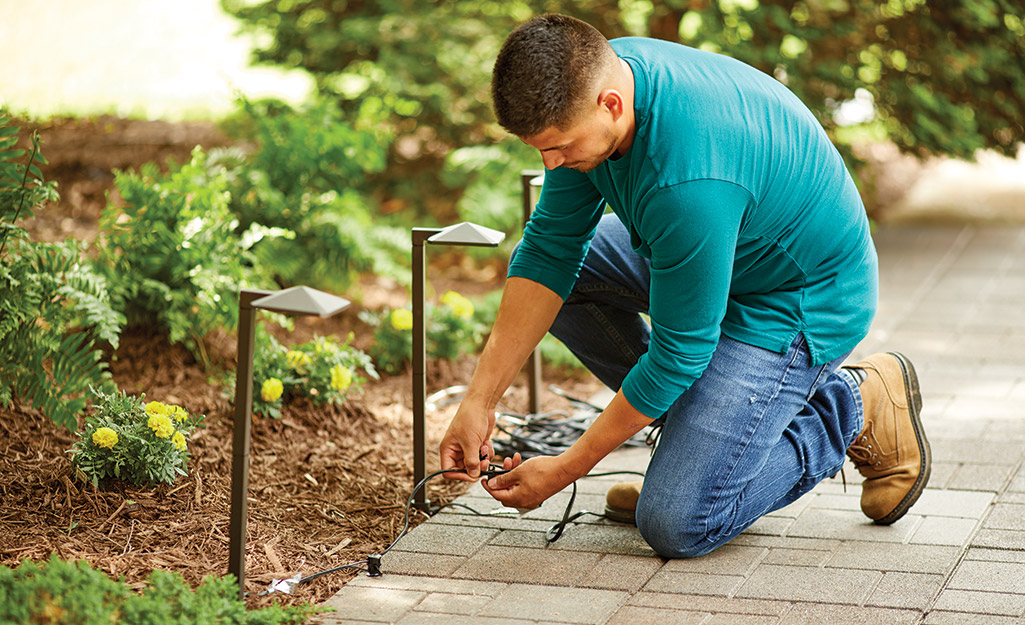
Step 5: Connect the Fixtures
Connect the fixtures to the low-voltage cable using waterproof wire connectors. Follow the manufacturer’s instructions for each fixture. Typically, you’ll need to strip the ends of the wires and twist them together with the connector. Make sure the connection is secure and waterproof to prevent corrosion and short circuits. Proper grounding is essential for safety. Ensure that all fixtures are properly grounded according to local electrical codes.
Step 6: Test the System
Before burying the cable, test the system to ensure that all the lights are working properly. Turn on the power at the breaker box and check each fixture. If any lights are not working, check the connections and the voltage at the fixture. A multimeter can be used to measure the voltage at each fixture. If the voltage is too low, you may need to use a thicker gauge wire or adjust the transformer settings.
Step 7: Bury the Cable
Once you’ve confirmed that the system is working properly, bury the cable in the trenches. Backfill the trenches with soil and tamp it down firmly. Be careful not to damage the cable while backfilling. Consider adding a layer of mulch or decorative rock to conceal the trenches and enhance the appearance of your landscape.
Troubleshooting Common Issues
Even with careful planning and installation, you may encounter some issues with your landscape lighting system. Here are some common problems and how to troubleshoot them:
- Lights Not Working: Check the power source, connections, and bulbs. Use a voltage tester to ensure that power is reaching the fixture.
- Dim Lights: This can be caused by voltage drop due to long wire runs or insufficient transformer capacity. Use thicker gauge wire or upgrade the transformer.
- Flickering Lights: This can be caused by loose connections or a faulty transformer. Check the connections and replace the transformer if necessary.
- Tripped Breaker: This can be caused by a short circuit in the wiring. Inspect the wiring for damage and repair any faulty connections.
Safety Precautions
Working with electricity can be dangerous, so it’s important to take safety precautions when how to wire landscape lighting:
- Always turn off the power before working on the wiring.
- Wear gloves and safety glasses to protect your hands and eyes.
- Use waterproof wire connectors to protect the connections from moisture.
- Follow all local electrical codes.
- If you’re not comfortable working with electricity, hire a qualified electrician.
Maintenance Tips
To keep your landscape lighting system working properly for years to come, follow these maintenance tips:
- Inspect the fixtures and wiring regularly for damage.
- Clean the lenses of the fixtures to maintain brightness.
- Replace bulbs as needed.
- Trim any vegetation that may be blocking the lights.
- Check the transformer connections and ensure they are secure.
By following these steps and tips, you can successfully wire landscape lighting and enhance the beauty and safety of your outdoor space. Remember to prioritize safety and consult with a qualified electrician if you have any doubts or concerns. [See also: Outdoor Lighting Design Ideas] Investing the time to learn how to wire landscape lighting correctly ensures a long-lasting and aesthetically pleasing result. Understanding the nuances of how to wire landscape lighting will save you money and offer you the ability to customize your outdoor experience. The knowledge of how to wire landscape lighting also allows for easier troubleshooting and maintenance of your system. Many homeowners find the process of learning how to wire landscape lighting empowering and rewarding. With proper planning and execution, knowing how to wire landscape lighting can transform your property. The satisfaction of completing a how to wire landscape lighting project is undeniable. Finally, mastering how to wire landscape lighting is a valuable skill for any homeowner. Remember to always prioritize safety when learning how to wire landscape lighting. Learning how to wire landscape lighting doesn’t have to be intimidating. Even beginners can master how to wire landscape lighting with the right guidance. Consider taking a workshop to learn how to wire landscape lighting from professionals. The principles of how to wire landscape lighting are relatively straightforward.
